No Compromise
No Excuses
No Limits

|
No Compromise |
|
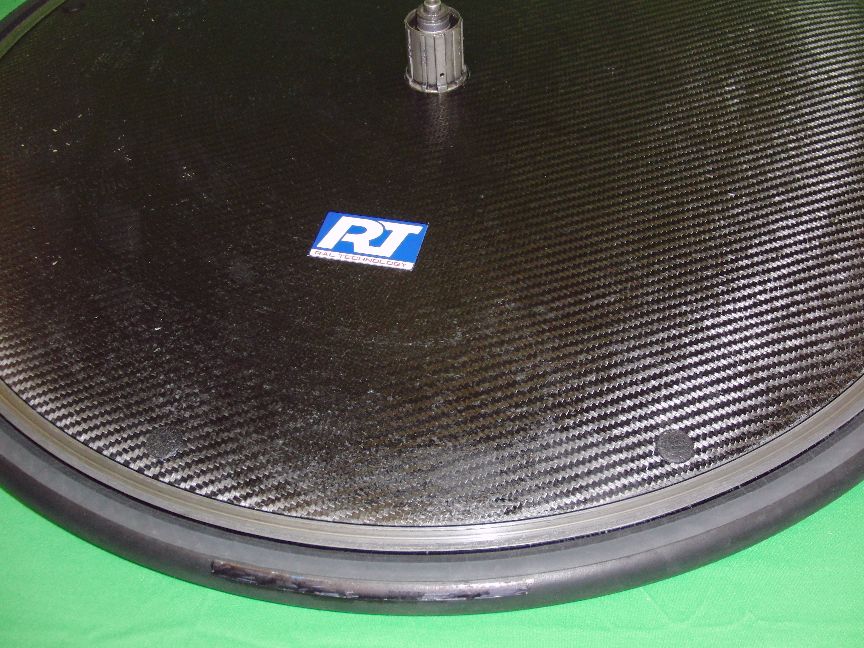
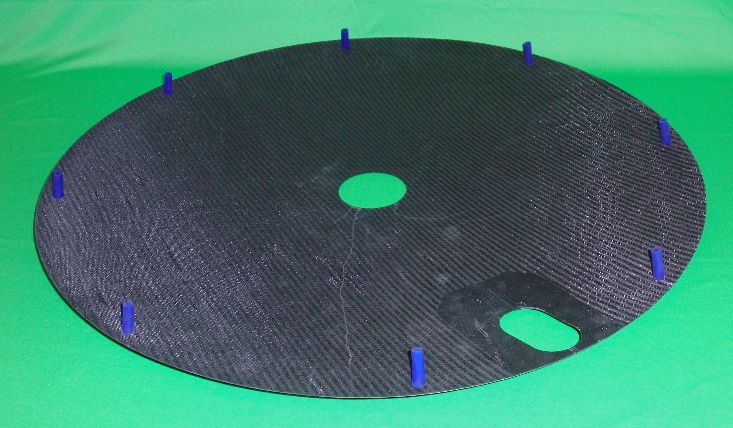
Fitting Instructions for RALTech Wheel Covers No special tools are required. However, you will need a chain whip and a cassette removal tool to remove the cassette. The Wheel Covers are supplied finished and smoothed, but it is still possible for a carbon shard to break free. If this sticks you in the finger it hurts. Lightweight cotton gloves are recommended for handling the Covers. You should have:- 1. Prepare Wheel Remove cassette and spacers, where fitted. Clean the hub, rim and spokes and check the spokes are not damaged or bent. 2. Prepare Wheel Cover
3. Fit to Wheel Place the wheel over the non-drive side Wheel Cover and begin by aligning the valve hole in the Cover with the wheel valve. The Mounting Buttons should fall between the spokes.
4. Finish Installation Refit the cassette, not forgetting any spacers you took off earlier.
5. Check Check that brakes function correctly. Occasionally, the wheel-engagement 'ears' may foul the disc covers, especially if the brake blocks are worn. The ears can be filed down or bent out of the way or removed completely, depending on the type. Check that the rear derailleur engages bottom gear without rubbing the Wheel Cover. Depending on the type of wheel and equipment used, spacing can be quite tight and the lower stop of the derailleur may need to be adjusted more accurately than when Wheel Covers are not used.
|
Wheel Covers are available here. |
© 2015 RAL Technology |
on Facebook. |
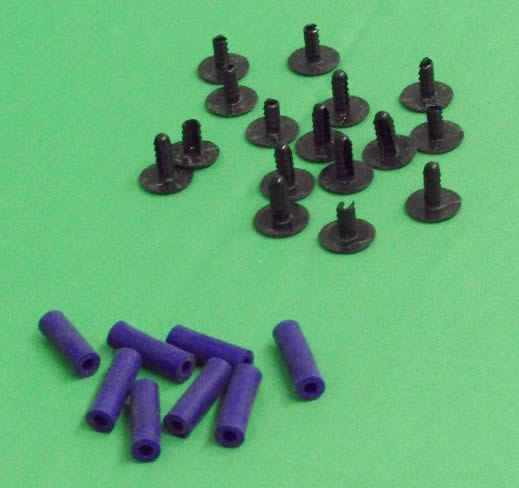
 Push a short Mounting Button through each hole in the non-drive side Wheel Cover and secure it by pressing a Flexible Spacer over it until it bottoms out.
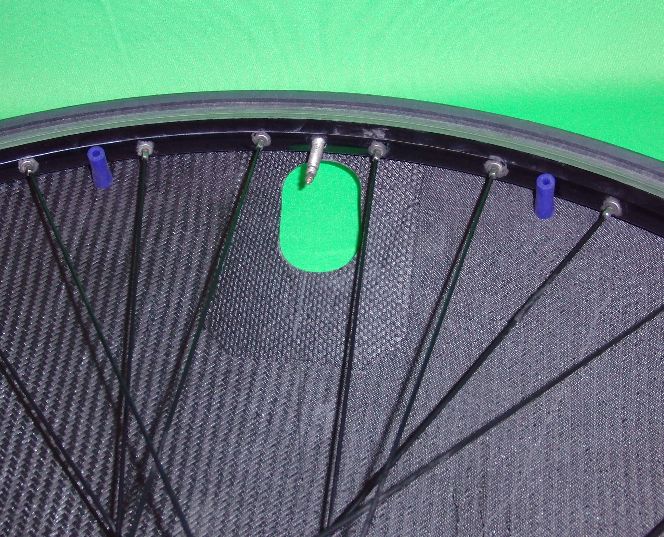
 One-by-one, push a long Mounting Button through each hole in the drive-side Cover and into the corresponding Spacer beneath it.